Oven Thermometer for Baking: The Cheapest Tool That Fixes Most Baking Problems
Quick Answer: An oven thermometer for baking is the single most underrated tool in any kitchen. Most home ovens run 25 to 50 degrees off their set temperature — some are even worse. That means every recipe you bake at “350°F” could actually be baking at 300°F or 400°F without you knowing. An $8 thermometer reveals the truth, and once you know the offset, you adjust the dial and every bake improves instantly. It’s the cheapest fix in baking with the biggest return.
This post contains affiliate links. If you buy through them, I may earn a small commission at no extra cost to you — it’s what keeps this site running and lets me keep testing gear so you don’t have to.
Your Oven Is Lying to You
This isn’t an exaggeration. It’s a fact that surprises almost every beginner baker I talk to.
When you set your oven to 350°F, the number on the dial is a suggestion — not a guarantee. Home ovens are calibrated once at the factory and then slowly drift over time. The thermostat ages. The heating elements wear. The door seal loosens. After a few years, most ovens are significantly off from what they display.
I tested my own oven the first time expecting it to be close. It was running 40 degrees hot. Forty degrees. That meant every time I baked cookies at “350°F,” they were actually baking at 390°F. No wonder the bottoms burned and the tops looked barely done.
The moment I started adjusting the dial to compensate, everything changed. Cookies came out golden and even. Cakes rose properly and baked through. Bread developed the right crust without scorching. Years of “I can’t bake” frustration disappeared because of an $8 thermometer.
How an Inaccurate Oven Ruins Your Baking
Different temperature errors create different problems. Here’s what happens when your oven isn’t where you think it is:
When Your Oven Runs Hot
Cookies: Bottoms burn while tops are still pale and underdone. Edges set too fast while centers stay raw. You take them out early to save the bottoms and end up with doughy middles.
Cakes: Edges and top crust over before the center finishes baking. This creates doming — the outside sets rigid while the still-liquid center pushes upward. You get a dense, humped cake instead of a flat, stackable layer.
Bread: The crust darkens too quickly, trapping moisture inside. You end up with a beautiful brown exterior hiding a gummy, underbaked crumb.
If any of this sounds familiar, check out our detailed guide on why cookies burn on the bottom — oven temperature is cause number one.
When Your Oven Runs Cold
Cookies: They spread too much before setting because the oven isn’t hot enough to firm the edges quickly. You get flat, thin, greasy cookies instead of thick, chewy ones.
Cakes: They don’t rise properly because the leavening gases escape before the structure sets. The result is a dense, flat cake. We covered this in detail in our post on why cakes are dense and flat.
Bread: It takes longer to develop a crust, which means more moisture evaporates. You get dry, pale bread that doesn’t have that satisfying crackle when you slice it.
When Your Oven Has Hot Spots
Some ovens heat unevenly — one side of the oven is significantly hotter than the other. This means one side of your cookie sheet browns faster, one side of your cake rises higher, or one end of your bread develops a thicker crust. An oven thermometer helps you identify these spots so you know to rotate your pans halfway through baking.
How to Test Your Oven in 5 Minutes
This is one of the easiest and most impactful things you can do as a home baker. Here’s exactly how:
Step 1: Place your oven thermometer on the center rack. Hang it from the rack if it has a hook, or stand it upright if it has a base.
Step 2: Set your oven to 350°F and let it preheat fully. Wait at least 15 minutes after the oven signals it’s ready — ovens often beep before they’ve actually stabilized.
Step 3: Read the thermometer without opening the door if possible (look through the window). If you need to open the door, do it quickly — the temperature drops fast when the door is open.
Step 4: Compare the thermometer reading to your dial setting. The difference is your oven’s offset.
Step 5: Test at a few different temperatures (325°F, 375°F, 400°F) to see if the offset is consistent. Some ovens run 25 degrees hot at every setting. Others have an offset that changes at different temperatures.
Step 6: Write the offset on a piece of tape and stick it to your oven. Something like “Runs 35°F hot — set 35° lower” is all you need. Now you never have to remember — just glance at the tape before you set the temperature.
That’s it. Five minutes of testing gives you accurate baking temperatures for life.
Types of Oven Thermometers
There are two main categories, and they serve different purposes:
Dial Thermometers (Analog)
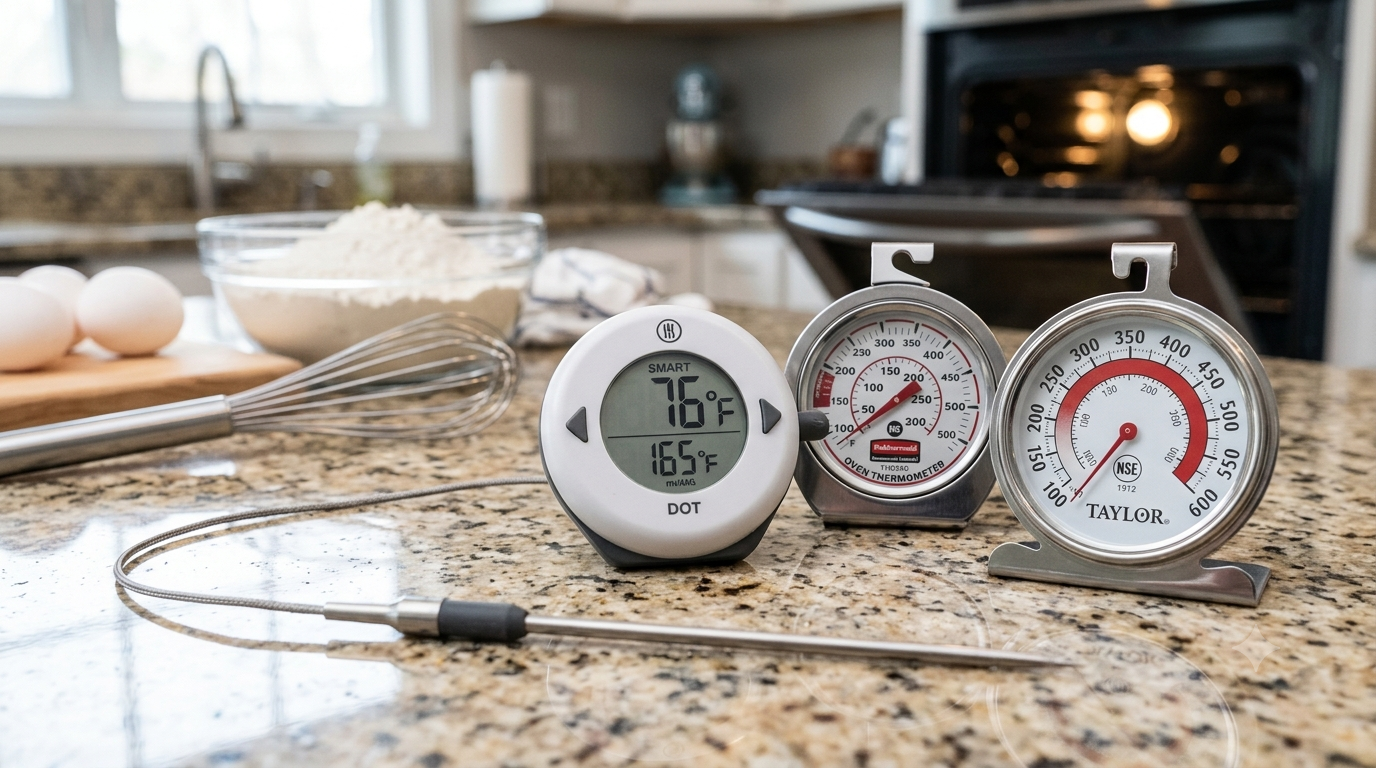
These are the classic hanging or standing thermometers that live inside your oven. They show you the ambient oven temperature at all times. You set one up, leave it in the oven permanently, and glance at it every time you bake.
Best for: Checking and correcting your oven’s temperature accuracy. This is what most home bakers need.
Limitations: They only tell you the air temperature inside the oven — not the internal temperature of your food. There’s also a slight delay in response time when the temperature changes.
Probe Thermometers (Digital)
These have a metal probe that you insert into the food itself, connected by a wire to a digital display that sits outside the oven. They tell you the exact internal temperature of bread, cakes, or roasted meats in real time.
Best for: Bread bakers who need to know when the internal temperature hits 190–210°F (the range for fully baked bread). Also essential for roasting meats to a precise temperature.
Limitations: They tell you the food temperature, not the oven temperature. They don’t replace a dial thermometer — they complement it.
For most home bakers, start with a dial thermometer. It solves the most common problem (inaccurate oven temperature) at the lowest cost. Add a probe thermometer later if you get into bread baking or want absolute precision on doneness.
The Best Oven Thermometers for Baking
Budget — Rubbermaid Commercial Stainless Steel Oven Thermometer (~$8–10)
This is the thermometer I recommend to everyone. It’s the same model used in commercial kitchens, it reads clearly, it hangs from any oven rack, and it costs less than a coffee. There is almost no reason to spend more unless you bake bread and need a probe thermometer.
Stainless steel construction means it won’t rust or degrade, and the dial is large enough to read through most oven windows. It’s the thermometer that lives in my oven permanently.
Pros:
- Cheapest effective oven thermometer available
- Stainless steel, built to last years
- Hooks onto any oven rack securely
- Reads temperatures from 60°F to 580°F
- Used in commercial kitchens
Cons:
- Small dial can be hard to read from across the kitchen
- Response time is slower than digital options
- No alert or alarm feature — you have to check it visually
👉 Check current price: Rubbermaid Oven Thermometer on Amazon →
Mid-Range — Taylor Large Dial Oven Thermometer (~$10–15)
The Taylor offers a bigger dial face than the Rubbermaid, making it easier to read at a glance — especially through the oven window without opening the door. NSF-certified, stainless steel, and built for both baking and grilling.
If the Rubbermaid’s small dial frustrates you, this is the upgrade. The functionality is identical — the extra few dollars just buy you a larger, easier-to-read display.
Pros:
- Large 3.25-inch dial — easy to read through the oven window
- NSF-certified for food safety
- Stainless steel construction
- Works for baking and grilling
- Can hang from rack or stand on shelf
Cons:
- Slightly slower to respond to temperature changes than digital options
- No alarm or alert feature
- Takes up a bit more space than the Rubbermaid
👉 Check current price: Taylor Large Dial Thermometer on Amazon →
Premium — ThermoWorks DOT Probe Thermometer (~$45–50)
This is a different category entirely. The ThermoWorks DOT is a probe thermometer — you insert the probe into your bread, cake, or roast, run the cable out through the oven door, and the external digital display shows the internal temperature in real time. You can set a target temperature and it beeps when your food reaches it.
This is the tool that takes bread baking from guesswork to science. Instead of tapping the bottom of a loaf and guessing if it sounds hollow, you know it’s done when the probe reads 200°F. No more cutting into bread to check and ruining the crumb structure.
Pros:
- Real-time internal food temperature monitoring
- Set target temperature with alarm — it tells you when food is done
- ThermoWorks accuracy and build quality
- Cable runs through the oven door — no opening required
- Useful for baking, roasting, grilling, and smoking
Cons:
- Does not replace a dial thermometer — this measures food temperature, not oven temperature
- Significantly more expensive than dial thermometers
- Overkill if you only bake cookies and simple cakes
- Probe cable can get in the way if you’re not used to it
Side-by-Side Comparison
| Thermometer | Price | Type | Measures | Best For |
|---|---|---|---|---|
| Rubbermaid Commercial | ~$8–10 | Dial | Oven air temp | Every baker — the essential |
| Taylor Large Dial | ~$10–15 | Dial | Oven air temp | Easier reading without opening door |
| ThermoWorks DOT | ~$45–50 | Digital probe | Internal food temp | Bread bakers, precision cooks |
Which One Should You Buy? Oven Thermometer For Baking
“I just want my oven to be accurate” → Rubbermaid. $8, problem solved.
“I want to read it easily without opening the oven” → Taylor Large Dial. Bigger face, same function.
“I bake bread and want to know exactly when it’s done” → ThermoWorks DOT. Different tool, different purpose — buy it alongside a dial thermometer, not instead of one.
My recommendation: Buy the Rubbermaid today. It’s $8. You’ll know your oven’s true temperature by tonight, and every single thing you bake from now on will be more consistent. If you get into bread baking later, add the ThermoWorks DOT.
Questions I Get Asked
“Can I just recalibrate my oven instead?”
Some ovens have a calibration function in the settings menu. If yours does, you can adjust the offset digitally. But even then, keep the thermometer in the oven. Ovens drift over time, and the calibration you set today might be off again in six months. A permanent thermometer catches any future drift.
“Where should I place the thermometer?”
Center rack, center of the oven. This gives you the most representative reading of the actual baking temperature. Avoid placing it near the walls, the door, or directly above the heating element — all of these spots read differently than where your food actually sits.
“Should I leave it in the oven all the time?”
Yes. That’s the whole point. A dial thermometer is designed to live in your oven permanently. You never have to remember to put it in before preheating — it’s always there, always reading, always accurate.
“My oven has a built-in thermometer on the display. Isn’t that enough?”
No. The built-in display shows what the thermostat thinks the temperature is — not what it actually is. The thermostat can drift, the sensor can degrade, and the reading can be significantly off. An independent thermometer inside the oven gives you the real number.
The Bottom Line
An oven thermometer for baking is the highest-impact, lowest-cost upgrade any home baker can make. For $8, you eliminate the single most invisible cause of baking failures — an oven that doesn’t do what it says.
Every other tool on your counter assumes your oven is accurate. Your scale weighs ingredients perfectly. Your recipe is tested and reliable. Your pans distribute heat evenly. But if the oven itself is 40 degrees off, none of that matters. The thermometer is the foundation that makes everything else work.
If you’re building your baking setup, an oven thermometer is one of the five tools in our beginner baking kit under $50. And if you’re ready for the full essential toolkit, our 10 Essential Baking Tools for Beginners guide covers everything with budget, mid-range, and premium picks.
Buy the thermometer. Test your oven. Adjust the dial. Bake with confidence.
Happy baking, Clara Belle
Last updated: [DATE]. Prices fluctuate — always check current Amazon pricing before buying.