Why Your Muffins Are Dry and Crumbly (6 Causes and How to Fix Them)
Quick Answer: If your muffins are dry and crumbly instead of moist and tender, the problem is almost always one of six things: too much flour, overmixing the batter, overbaking, too little fat, wrong oven temperature, or old leavening. The most common culprit is too much flour from scooping with a measuring cup — the same mistake that causes dense cakes and dry cookies. Weigh your flour on a scale or use the spoon-and-level method and your muffins will transform immediately.
This post contains affiliate links. If you buy through them, I may earn a small commission at no extra cost to you — it’s what keeps this site running and lets me keep testing gear so you don’t have to.
Muffins Should Be Moist — If Yours Aren’t, Something Specific Is Wrong
A good muffin is tender, moist, and slightly crumbly in the best way — it breaks apart softly when you pull it, not in dry chunks that scatter across the plate. If your muffins come out of the oven dry, tough, or so crumbly they fall apart when you peel the liner off, there’s a specific reason. And it’s fixable.
Muffins are one of the most forgiving things you can bake — the batter comes together in minutes and the margin for error is wider than cakes or bread. So when they go wrong, the cause is usually one obvious mistake, not a combination of subtle ones. Find it, fix it, and your next batch will be completely different.
Reason #1: Too Much Flour
This is the number one cause of dry muffins, dry cakes, dry cookies — dry everything. It’s the single most common baking mistake and it affects muffins especially because muffin batters are thick to begin with. Extra flour pushes them from thick and moist to dense and dry.
When you scoop a measuring cup directly into a flour bag, you pack the flour in and can end up with 40 to 50 percent more than the recipe intended. All that extra flour absorbs the moisture that should be keeping your muffins tender. The result is a dry, crumbly muffin that tastes like it needed another egg or more butter — when really it just needed less flour.
The fix: Weigh your flour on a kitchen scale. One cup of all-purpose flour should weigh 120 to 130 grams. If you don’t have a scale, use the spoon-and-level method — spoon flour into the cup with a separate spoon, then level with a knife. Never scoop directly from the bag.
Our complete guide on how to measure flour correctly covers the three methods ranked best to worst, plus a conversion chart for every common baking ingredient.
Reason #2: Overmixing the Batter
This is the mistake unique to muffins because muffin batter behaves differently than cake batter.
When you mix flour with liquid, you develop gluten — the stretchy protein that gives baked goods their structure. In cakes, a moderate amount of mixing is fine because the higher fat and sugar content softens gluten’s toughening effect. But muffin recipes typically have less fat and sugar than cakes, which means there’s less cushion against overdeveloped gluten.
Overmixed muffin batter produces tough, dry muffins with tunneling — long vertical holes running through the interior instead of the soft, even crumb you want. The muffins may also have peaked, pointy tops instead of gently rounded ones.
The fix: Mix until just barely combined — then stop.
Muffin batter should look lumpy. Not smooth, not uniform — lumpy. When you add your wet ingredients to your dry ingredients, fold them together with a silicone spatula using as few strokes as possible. Stop the moment you don’t see dry flour streaks. Some small lumps and a few wisps of flour are perfectly fine — they disappear in the oven.
The standard rule is 10 to 15 strokes maximum from the moment wet meets dry. Count them if you need to. It feels wrong to stop that early, but it produces the best muffins.
👉 Check current price: ChefAide Silicone Spatula Set on Amazon →
Reason #3: Overbaking
Muffins go from perfectly moist to dry in a surprisingly small window — sometimes just 2 to 3 minutes. If you’re setting a timer based on the recipe and walking away, you might be overbaking without realizing it, especially if your oven runs hot.
The problem is that muffins continue baking from residual heat after you pull them from the oven. If they’re perfectly done when you take them out, they’ll be slightly overdone by the time they cool. If they’re already a little overdone in the oven, they’ll be dry by the time they reach the plate.
The fix: Start checking 2 to 3 minutes before the recipe says.
If a recipe says bake for 20 minutes, start checking at 17 minutes. Insert a toothpick into the center of one muffin. If it comes out with a few moist crumbs clinging to it, they’re done. If it comes out completely clean, you’ve gone slightly too far — still edible, but drier than ideal.
Also verify your oven temperature. If your oven runs 25 degrees hot, your muffins have been baking at 400°F when the recipe said 375°F. That’s enough to dry them out every time. An oven thermometer fixes this permanently.
👉 Check current price: Rubbermaid Oven Thermometer on Amazon →
We covered oven temperature issues in detail in our oven thermometer guide — the same calibration that fixes burnt cookies and flat cakes also fixes dry muffins.
Reason #4: Not Enough Fat
Fat is what makes muffins moist. Butter, oil, sour cream, yogurt, milk — these ingredients coat the flour particles, slow gluten development, and create the tender, moist texture that makes a muffin satisfying instead of chalky.
If you reduced the butter or oil to make “healthier” muffins, or if you substituted a lower-fat ingredient without adjusting the recipe, the muffins will be noticeably drier.
The fix:
- Follow the recipe’s fat amounts exactly — don’t reduce oil or butter to save calories without expecting a texture change
- If you want to reduce fat, replace some of it with an equal amount of Greek yogurt, sour cream, or applesauce — these add moisture and tenderness without as much fat
- Use whole milk or buttermilk instead of skim milk — the extra fat content makes a real difference in muffins
- If a recipe calls for oil, use oil — don’t substitute melted butter unless the recipe says you can. Oil coats flour more effectively than butter and produces a moister crumb
Reason #5: Wrong Oven Temperature
Muffins need a blast of high heat to set the structure quickly and trap moisture inside. Most muffin recipes bake at 375°F to 425°F — hotter than cakes or cookies. If your oven runs cold, the muffins bake too slowly. The longer they sit in the oven, the more moisture evaporates. The result is a dry, flat muffin that took 30 minutes to bake when it should have taken 18.
Conversely, if your oven runs hot, the outside crusts over too fast while the inside is still raw. You end up baking longer to cook the center, which dries out the edges.
The fix: Use an oven thermometer to check your actual temperature. Adjust the dial so the inside of the oven matches what the recipe calls for. This same fix improves everything you bake — muffins, cookies, cakes, and bread.
👉 Check current price: Rubbermaid Oven Thermometer on Amazon →
Reason #6: Dead Leavening
Baking powder and baking soda don’t just make muffins rise — they also affect texture. When leavening works properly, it creates tiny air pockets throughout the batter that make the muffin light and tender. When leavening is expired or weak, those pockets don’t form. The muffin is denser and more compact, which makes it feel drier even if the moisture content is technically the same.
The fix: Test your leavening before you bake.
Baking powder: Drop a teaspoon into hot water. Vigorous fizzing means it’s good. No reaction means it’s dead.
Baking soda: Drop a teaspoon into vinegar. Immediate, aggressive bubbling means it’s active. Weak reaction means replace it.
Replace baking powder every 6 to 12 months and baking soda every 6 months once opened. Store both sealed in a cool, dry spot — not next to the stove.
The Quick-Fix Checklist
Next time your muffins are dry and crumbly, work through this list:
- Weigh your flour — 120 to 130 grams per cup, never scoop from the bag
- Mix less — 10 to 15 strokes maximum after wet meets dry, batter should be lumpy
- Check early — start testing 2 to 3 minutes before the recipe says
- Don’t reduce fat — follow the recipe’s butter, oil, and dairy amounts exactly
- Check your oven — use a thermometer to verify the real temperature
- Test your leavening — baking powder and soda lose potency over time
Most dry muffins are caused by just one of these — usually too much flour or overmixing. Fix that one thing and the problem disappears.
The Tools That Fix Dry Muffins
| Problem | Fix | Approx. Cost |
|---|---|---|
| Too much flour | Digital kitchen scale | ~$13 |
| Overmixing | Silicone spatula (fold by hand) | ~$9 |
| Overbaking / wrong temp | Oven thermometer | ~$8 |
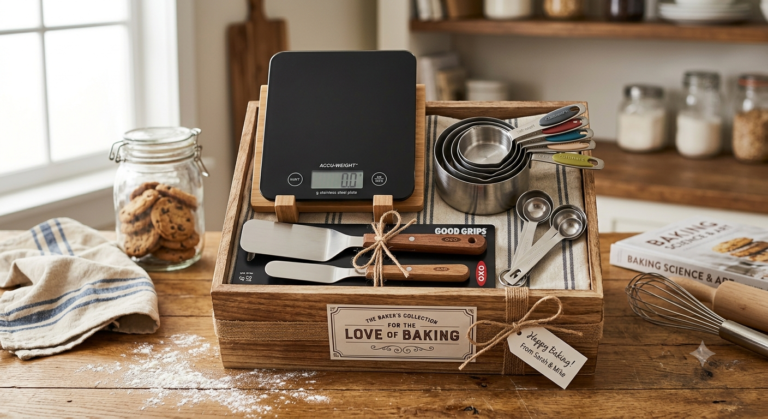
Total: ~$30. These are the same tools from our beginner baking kit under $50 — they fix dry muffins, burnt cookies, dense cakes, and bread that won’t rise. One set of tools, dozens of problems solved.
Bonus: The Muffin Pan Matters Too
If your muffins bake unevenly — some dry and some underdone in the same batch — your pan might have hot spots or be made from dark nonstick material that absorbs too much heat.
A light-colored aluminum muffin pan distributes heat more evenly and gives every muffin in the batch the same baking conditions. The same dark vs light pan science that applies to cookies and cakes applies to muffins too.
The Bottom Line
Dry, crumbly muffins are one of the most common and most fixable baking problems. The batter came together in 5 minutes — the solution is usually just as fast. Weigh your flour, stop mixing sooner, and pull them from the oven a few minutes earlier. That’s it.
Muffins are supposed to be forgiving. With the right technique and a couple of basic tools, they will be.
For more tools and guides that fix common baking problems, check out our baking essentials checklist or our complete Essential Baking Tools for Beginners guide.
Happy baking, Clara Belle
Last updated: [DATE]. Prices fluctuate — always check current Amazon pricing before buying.