Why Cakes Are Dense and Flat (And How to Fix It Every Time)
Quick Answer: Wondering why cakes are dense and flat? It almost always comes down to one of six problems: too much flour, expired leavening, overmixing, wrong oven temperature, wrong pan, or cold ingredients. The biggest culprit by far is too much flour from measuring with cups instead of a scale. If you fix nothing else, weigh your flour — that single change transforms dense bricks into fluffy layers.
This post contains affiliate links. If you buy through them, I may earn a small commission at no extra cost to you — it’s what keeps this site running and lets me keep testing gear so you don’t have to.
The Frustration Is Real
You follow the recipe exactly. You preheat the oven. You set a timer. You do everything right — and you still pull out a cake that’s flat, heavy, and nothing like the picture. Here are the six most common reasons why cakes are dense and flat, ranked by how likely they are to be your problem.
But there is an explanation. In fact, there’s usually one very specific reason your cake is dense, and once you identify it, the fix is simple. I went through this exact cycle for months before I figured out what was going wrong, and the answer surprised me — it had nothing to do with my technique and everything to do with my tools and ingredients.
Here are the six most common reasons cakes turn out dense and flat, ranked by how likely they are to be your problem.
Reason #1: You’re Using Too Much Flour
This is the cause at least half the time, and it’s the one nobody suspects.
When you scoop a measuring cup directly into a bag of flour, you pack the flour into the cup. A “cup” of flour measured this way can weigh 180 grams or more. But most recipes are developed assuming a cup weighs around 120 to 130 grams. That means you could be adding 40 to 50 percent more flour than the recipe intends — without realizing it.
Too much flour means too much structure. The cake becomes rigid and heavy instead of tender and airy. The extra flour absorbs moisture that should be creating steam and lift, leaving you with a dense, dry result.
The fix: Weigh your flour with a digital kitchen scale.
This is the single most important upgrade for any baker who struggles with dense cakes. When a recipe says “2 cups of flour (240g),” ignore the cups and weigh out 240 grams. You’ll get the exact same amount every single time, and your cakes will suddenly become consistent.
If a recipe doesn’t give gram measurements, use 120–130 grams per cup of all-purpose flour as your standard conversion.
For a full comparison of budget to premium scales, check out our Essential Baking Tools for Beginners guide.
If you absolutely must use measuring cups, use the spoon and level method: spoon flour into the measuring cup with a separate spoon (don’t scoop), then level off the top with a knife. This gets you closer to the correct weight — but a scale is still more accurate.
Reason #2: Your Leavening Is Dead
Baking powder and baking soda are the ingredients responsible for making your cake rise. They create tiny gas bubbles in the batter that expand in the oven, lifting the cake from a dense blob into a fluffy layer. When they’re expired or weak, those bubbles never form and your cake stays flat.
How to tell if they’re still good:
Baking powder test: Drop a teaspoon of baking powder into a cup of hot water. If it fizzes vigorously, it’s fine. If it barely reacts or just sinks, replace it.
Baking soda test: Drop a teaspoon of baking soda into a small amount of vinegar. It should bubble immediately and aggressively. If the reaction is weak, it’s time for a new box.
The fix:
- Test your leavening agents before blaming anything else
- Replace baking powder every 6 to 12 months — even if the can isn’t empty
- Replace baking soda every 6 months if it’s been opened
- Store both in a cool, dry place with the lid tightly sealed — not next to the stove where heat degrades them faster
- Write the date you opened the container on the lid with a marker
This is a free fix that solves the problem immediately. No new tools required.
Reason #3: You’re Overmixing the Batter
When you mix cake batter, you’re developing gluten — the protein network that gives baked goods their structure. A little gluten is good. It holds the cake together. Too much gluten turns your cake into a chewy, dense, bread-like mass.
Here’s how overmixing happens: you add the flour to your wet ingredients and keep stirring until the batter looks perfectly smooth. By that point, you’ve developed far too much gluten. The cake bakes up tough, dense, and often with a gummy texture.
The fix: Mix until just combined — then stop.
When you add flour to your wet ingredients, mix on the lowest speed (or fold by hand with a spatula) and stop the moment you no longer see dry flour streaks. The batter might still have a few small lumps. That’s fine. Those lumps disappear in the oven. What won’t disappear is the tough texture from overmixing.
A good silicone spatula makes this easier because you can gently fold the flour in by hand instead of relying on a mixer that’s harder to control at low speeds.
👉 Check current price: ChefAide Silicone Spatula Set on Amazon →
Reason #4: Your Oven Temperature Is Wrong
If your oven runs hot, the outside of your cake sets before the inside has a chance to rise. This creates a dense interior with a thick, dark crust. If your oven runs cold, the leavening gases escape before the structure sets, and the cake falls flat.
Either way, the result is a cake that’s dense, flat, or both.
Most home ovens run 25 to 50 degrees off their displayed temperature. Some swing wildly during a bake — heating well past the set temperature, then dropping below it, then overshooting again. Your cake is at the mercy of these swings unless you know about them.
The fix: Use an oven thermometer.
Hang a thermometer from your oven rack and check the actual temperature before you start baking. If your oven runs 30 degrees hot, set it 30 degrees lower than the recipe calls for. If it runs cold, bump it up. This one-time calibration fix improves every single thing you bake going forward.
👉 Check current price: Rubbermaid Oven Thermometer on Amazon →
👉 Check current price: Taylor Large Dial Oven Thermometer on Amazon →
We covered this in detail in our guide on why cookies burn on the bottom — the same oven issues that burn cookies also flatten cakes.
Reason #5: Your Pan Is the Wrong Size or Material
This is the reason people overlook most often.
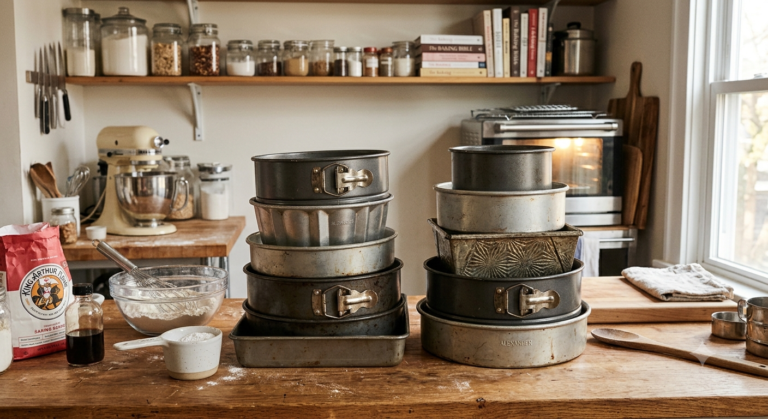
Wrong size: If a recipe calls for two 9-inch round pans and you use two 8-inch pans, the batter sits deeper in the smaller pans. Deeper batter takes longer to bake through the center, and the outside overcooks while waiting. The result is a cake that’s dense in the middle and overdone on the edges. Go the other direction — batter in pans that are too large — and it spreads too thin and overbakes entirely.
Wrong material: Dark-colored pans absorb more heat and cook the edges and bottom faster, creating an uneven bake. The edges set and crust over while the center is still struggling to rise. Light-colored aluminum pans distribute heat more evenly and give the whole cake a chance to rise together.
The fix: Use the right size pan in light-colored aluminum.
Always match the pan size the recipe specifies. If you’re not sure what size your pans are, measure the inside diameter across the top with a ruler.
For material, light aluminum or anodized aluminum cake pans give you the most even results. Fat Daddio’s is the pan that professional cake decorators use — and it’s surprisingly affordable.
👉 Check current price: Fat Daddio’s 9-Inch Round Cake Pan on Amazon →
👉 Check current price: Wilton Performance 9-Inch Round Cake Pan on Amazon →
For a full breakdown of why pan material matters so much, read our dark vs light baking pans comparison.
Reason #6: Your Ingredients Were Too Cold
Cake recipes that call for “room temperature” eggs, butter, and milk aren’t being fussy — there’s real chemistry behind it.
Cold butter won’t cream properly with sugar. Creaming is the process of beating butter and sugar together until fluffy and pale — this creates tiny air pockets that become the foundation of your cake’s rise. If the butter is cold and firm, it won’t trap air. If it’s melted, it won’t hold air at all. You need it cool but pliable.
Cold eggs can cause creamed butter to seize and curdle, breaking the emulsion and losing the air you just worked to incorporate.
Cold milk can do the same thing — shocking the batter and deflating it.
The fix: Let everything come to room temperature before you start.
- Butter: Take it out 30 to 45 minutes before baking. It should be cool to the touch but leave a clean indent when you press it. Don’t microwave it.
- Eggs: Set them on the counter 20 to 30 minutes ahead. In a rush? Place them in a bowl of warm (not hot) water for 5 to 10 minutes.
- Milk and sour cream: Set them out when you set out the butter. 20 minutes is usually enough.
This is another free fix that makes an immediate difference. No tools required — just planning ahead.
The Quick-Fix Checklist
Now that you understand why cakes are dense and flat, work through this list next time :
- Weigh your flour — stop scooping with cups
- Test your leavening — baking powder and soda expire
- Mix less — stop when the flour just disappears
- Check your oven — use a thermometer to verify the real temperature
- Check your pan — right size, light-colored aluminum
- Warm your ingredients — room temperature butter, eggs, and milk
Most dense cakes are caused by just one or two of these issues. Fix those and the problem disappears completely.
The Tools That Fix Dense Cakes
| Problem | Fix | Approx. Cost |
|---|---|---|
| Too much flour | Digital kitchen scale | ~$13 |
| Wrong oven temp | Oven thermometer | ~$8 |
| Wrong pan material | Light aluminum cake pan | ~$12–20 |
| Overmixing | Silicone spatula (fold by hand) | ~$9 |
Total to fix everything: under $50. And if you already have our beginner baking kit, you’ve got most of these covered.
The Bottom Line
There are many reasons why cakes are dense and flat, but they’re not a sign that you’re bad at baking. They’re a sign that one specific thing is off — and finding that one thing changes everything.
Start with the flour. Weigh it instead of scooping it. That single change fixes more dense cake problems than every other tip combined. If weighing your flour doesn’t solve it, work through the rest of the checklist one item at a time until you find your culprit.
The tools that fix this problem — a scale, a thermometer, and the right pan — are the same tools that fix almost every common baking failure. If you’re tired of guessing what went wrong, our complete Essential Baking Tools for Beginnersguide breaks down everything you need with budget, mid-range, and premium options.
Happy baking, Clara Belle
Last updated: [DATE]. Prices fluctuate — always check current Amazon pricing before buying.