Why Your Bread Won’t Rise (7 Causes and How to Fix Every One)
Quick Answer: If your bread won’t rise, the cause is almost always one of seven fixable problems: dead yeast, water that was too hot, a kitchen that’s too cold, too much flour, too much salt, not enough kneading, or the wrong pan size. The most common culprit is dead or expired yeast — test it before you commit to a full batch. The second most common is water temperature — anything above 120°F kills yeast instantly. Both are easy to prevent once you know what to look for.
This post contains affiliate links. If you buy through them, I may earn a small commission at no extra cost to you — it’s what keeps this site running and lets me keep testing gear so you don’t have to.
Before You Blame Yourself
Flat, dense bread that refuses to rise is one of the most demoralizing baking failures because you’ve invested real time — mixing, kneading, waiting — only to discover an hour later that nothing happened. The dough just sat there like a lump.
But here’s the thing: bread that won’t rise is almost never a skill problem. It’s a science problem. Bread rises because yeast produces carbon dioxide gas, and gluten traps that gas in tiny bubbles throughout the dough. If either half of that equation breaks — the yeast doesn’t produce gas, or the gluten can’t trap it — the bread stays flat.
Once you understand which half broke and why, the fix is usually simple. Here are the seven most common reasons, ranked by how likely they are to be your problem.
Reason #1: Your Yeast Is Dead or Expired
This is the cause more than half the time, and it’s the easiest to prevent.
Yeast is a living organism. It can die from age, heat exposure, or improper storage. That jar of yeast that’s been sitting in your pantry for two years? There’s a good chance it’s mostly dead, even if the expiration date hasn’t passed. Opened yeast loses potency much faster than sealed packets.
How to tell if your yeast is still alive (the proof test):
- Put 1/4 cup of warm water (100–110°F) in a small bowl
- Stir in 1 teaspoon of sugar
- Sprinkle the amount of yeast your recipe calls for on top
- Wait 10 minutes
If the surface is foamy and bubbly, your yeast is alive and ready to work. If nothing happens — no foam, no bubbles, just cloudy water — the yeast is dead. Throw it out and buy fresh.
How to prevent this:
- Store opened yeast in the refrigerator or freezer in an airtight container
- Buy individual packets instead of jars if you bake less than once a week — they stay fresh longer
- Always proof your yeast before adding it to flour, especially if it’s been open for more than a few weeks
- Check the expiration date before you start — don’t discover it halfway through a recipe
Reason #2: Your Water Was Too Hot
This is the most heartbreaking mistake because it’s invisible. You killed the yeast before the recipe even started, and you won’t find out until an hour later when the dough hasn’t moved.
Yeast thrives in warm water — between 100°F and 110°F. Water above 120°F starts damaging yeast cells. Water above 140°F kills yeast almost instantly. The problem is that most people don’t know what 110°F feels like. To your hand, it feels “comfortably warm.” Water that feels “hot” is already too hot.
The fix: Use a thermometer.
An instant-read kitchen thermometer takes the guessing out entirely. Dip it in the water, read the number, and adjust until you’re in the 100–110°F sweet spot. It takes five seconds and saves you an hour of waiting for dough that will never rise.
If you don’t have a thermometer, use this rule: the water should feel warm on the inside of your wrist — like bathwater for a baby. If it feels hot, it’s too hot. When in doubt, go cooler. Slightly cool water means a slower rise, but a slow rise actually produces better flavor. Hot water means dead yeast and no rise at all.
👉 Check current price: Rubbermaid Oven Thermometer on Amazon →
For a full guide on thermometers for baking, read our oven thermometer deep dive.
Reason #3: Your Kitchen Is Too Cold
Yeast is most active between 75°F and 85°F. At room temperature in most homes (around 68–72°F), yeast works, but slowly. Below 65°F, yeast activity slows dramatically. In a cold kitchen — winter months, air conditioning cranked up, drafty house — what should take an hour might take three or four.
Many beginners set a timer based on the recipe (“let rise for 1 hour”), check the dough when the timer goes off, see it hasn’t doubled, and assume something went wrong. Nothing went wrong — the kitchen is just cold and the yeast needs more time.
The fix: Create a warm proofing environment.
- Oven method: Preheat your oven to the lowest setting (usually 170°F), turn it off completely, then place your covered dough inside. The residual warmth creates a perfect proofing box. Some ovens even have a “proof” setting specifically for this.
- Microwave method: Boil a cup of water in the microwave. Leave the hot water inside, put your covered dough next to it, and close the door. The steam and warmth create a humid, warm environment.
- On top of the fridge: The motor generates gentle warmth that rises from the back. Set your covered dough on top.
Critical rule: Judge the rise by size, not by time. “Let rise until doubled” means wait until it has actually doubled in volume — that might take 45 minutes in a warm kitchen or 3 hours in a cold one. The dough doesn’t care what the clock says.
How to tell if it’s doubled: Press two floured fingers about half an inch into the dough. If the indentation stays, it’s ready. If it springs back, it needs more time.
Reason #4: You Used Too Much Flour
This is the same problem that causes dense cakes and dry cookies — measuring flour by scooping a cup directly from the bag packs it in and gives you far more than the recipe intended.
With bread, excess flour creates a dough that’s too stiff for the yeast to inflate. Imagine trying to blow up a balloon that’s wrapped in duct tape — the gas is there, but the structure won’t stretch. Too much flour does the same thing to bread dough. The gluten network is too tight and rigid for the CO2 bubbles to expand.
Excess flour also absorbs moisture that the yeast needs to feed. Drier dough means less active yeast, which means less gas, which means less rise.
The fix: Weigh your flour.
A kitchen scale eliminates this problem entirely. Standard bread flour is about 130 grams per cup. Weigh it, and you’ll get the same amount every single time.
If you don’t have a scale, use the spoon-and-level method — spoon flour into the cup with a separate spoon, then level the top with a knife. Never scoop from the bag. Our how to measure flour correctly guide covers this in detail.
Also important: Resist the urge to add extra flour during kneading just because the dough feels sticky. Bread dough is supposed to feel tacky. A properly hydrated dough will be slightly sticky to the touch — that’s a sign of good hydration, not a problem to fix. Adding flour during kneading to make it “easier to handle” tightens the dough and suppresses the rise.
Reason #5: You Used Too Much Salt (or Salt Touched the Yeast)
Salt is essential in bread — it controls yeast activity, strengthens gluten, and adds flavor. But too much salt inhibits yeast, and direct contact between salt and undissolved yeast can kill yeast cells on contact.
This happens most often when bakers dump all the dry ingredients into the bowl at once. If the salt lands directly on top of the yeast before flour and water dilute it, the high salt concentration dehydrates and kills the yeast cells before they ever get a chance to activate.
The fix:
- Measure salt carefully — more is not better in bread baking
- Never pour salt directly onto yeast in the bowl
- Mix yeast into the flour first, then add salt on the opposite side of the bowl
- Or dissolve the yeast in water first (if using active dry yeast), then add salt to the flour separately
Reason #6: You Didn’t Knead Enough
Kneading develops gluten — the stretchy protein network that traps the CO2 gas produced by yeast. Without enough gluten development, the gas escapes instead of being held in tiny bubbles throughout the dough. The dough may rise slightly but won’t hold its shape or achieve full volume.
Under-kneaded dough feels rough, tears easily when stretched, and doesn’t pass the “windowpane test” — where you stretch a small piece thin enough to see light through it without it tearing.
The fix:
By hand: Knead for a full 10 to 15 minutes. Set a timer — most people underestimate how long they’ve been kneading. The dough should transform from a shaggy, rough mass into a smooth, elastic ball that bounces back when poked.
With a stand mixer: Use the dough hook on speed 2 for 8 to 10 minutes. The mixer does the work while you prep other ingredients. This is where a stand mixer genuinely earns its counter space — sustained kneading is the one task that a hand mixer simply cannot handle.
For a comparison of hand mixers vs stand mixers and when it’s worth upgrading, read our hand mixer vs stand mixer guide. If you’re ready to invest in a stand mixer for bread baking, our best stand mixers under $300 guide covers every option.
Reason #7: You’re Using the Wrong Pan
This one surprises people, but the wrong pan can make a perfectly risen dough look like it barely rose at all.
A standard sandwich bread recipe is designed for an 8½ x 4½ inch loaf pan. If you use a 9 x 5 inch pan — which is the most common size sold for quick breads like banana bread — the same amount of dough spreads wider and sits lower. The loaf comes out shorter and flatter, even though the dough rose exactly the same amount.
That 9 x 5 pan has about 30% more volume than the 8½ x 4½ pan. That’s enough to make a perfectly risen loaf look underwhelming.
The fix:
- Check your recipe for the specified pan size and use it
- If your recipe doesn’t specify, 8½ x 4½ inches is standard for yeast breads
- Measure your pan across the top — not the bottom — to determine its size
- If you only have the larger pan, increase your recipe by about 30% to fill it properly
👉 Check current price: USA Pan 8.5 x 4.5 Loaf Pan on Amazon →
The Quick-Fix Checklist
Next time your bread won’t rise, work through this list in order:
- Test your yeast — proof it in warm water with sugar before using
- Check your water temperature — 100–110°F, no hotter
- Check your kitchen temperature — create a warm proofing spot if below 70°F
- Weigh your flour — stop scooping from the bag
- Keep salt away from yeast — never pour salt directly onto undissolved yeast
- Knead enough — 10–15 minutes by hand, 8–10 with a stand mixer
- Check your pan size — 8½ x 4½ for standard yeast bread
Most bread that won’t rise has only one of these problems. Find it, fix it, and your next loaf will rise beautifully.
The Tools That Fix Bread Problems
| Problem | Fix | Approx. Cost |
|---|---|---|
| Don’t know water temperature | Kitchen thermometer | ~$8–15 |
| Too much flour | Digital kitchen scale | ~$13 |
| Under-kneaded dough | Stand mixer with dough hook | ~$130–250 |
| Wrong pan size | Correct loaf pan | ~$15–20 |
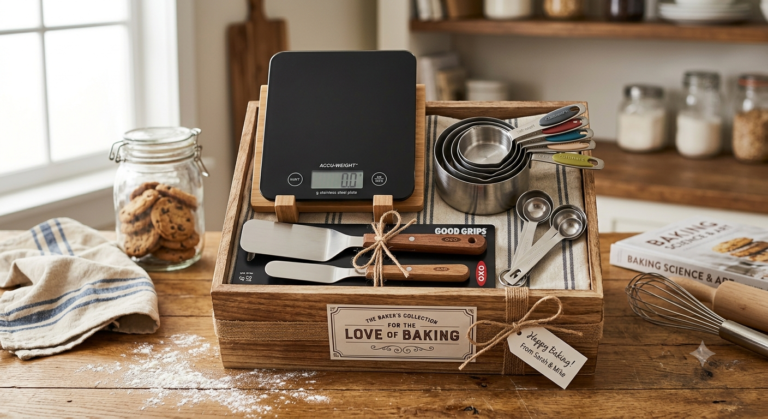
If you already have our beginner baking kit, you’ve got the scale and thermometer covered. The stand mixer and loaf pan are upgrades for when you’re baking bread regularly.
The Bottom Line
Bread that won’t rise feels like a mystery, but it’s almost always one of seven specific, fixable causes. The yeast is dead, the water was too hot, the kitchen is too cold, there’s too much flour, the salt killed the yeast, the dough wasn’t kneaded enough, or the pan is the wrong size.
Start with the yeast. Proof it every single time until you trust your supply. Check your water temperature. Weigh your flour. Those three fixes alone solve the vast majority of rising failures.
Bread baking has a learning curve, but it’s a short one. Once you understand what yeast needs — warmth, moisture, food, and time — you’ll never pull a flat loaf from the oven again.
For more tools that make baking consistent, check out our Essential Baking Tools for Beginners guide.
Happy baking, Clara Belle
Last updated: [DATE]. Prices fluctuate — always check current Amazon pricing before buying.