How to Measure Flour Correctly for Baking ( 3 Methods to Stop Ruining Your Recipes)
Quick Answer: Learning how to measure flour correctly is the single most important skill in baking. The best method is weighing it on a digital kitchen scale — 1 cup of all-purpose flour should weigh 120 to 130 grams. If you don’t have a scale yet, use the spoon-and-level method: spoon flour into your measuring cup with a separate spoon, then level the top with a straight edge. Never scoop directly from the bag — that packs the flour and can add 50% more than the recipe intends.
This post contains affiliate links. If you buy through them, I may earn a small commission at no extra cost to you — it’s what keeps this site running and lets me keep testing gear so you don’t have to.
Why This Is the Most Important Baking Skill
I know that sounds dramatic for something as simple as putting flour in a cup. But here’s the reality: incorrect flour measurement is the number one cause of baking failures for home bakers. More than oven temperature. More than mixing technique. More than ingredient quality.
And the reason is simple — a “cup” of flour isn’t a fixed amount. Depending on how you get the flour into the cup, you could end up with 120 grams or 180 grams. That’s a 50% difference in the most important structural ingredient in nearly every baked good. And that difference is the gap between a fluffy cake and a dense brick, between a chewy cookie and a dry crumbly disc, between bread that rises and bread that doesn’t.
Every time someone tells me “I followed the recipe exactly but it didn’t work,” this is the first thing I ask about. Nine times out of ten, it’s the flour.
The Three Methods For How to Measure Flour Correctly (Ranked Best to Worst)
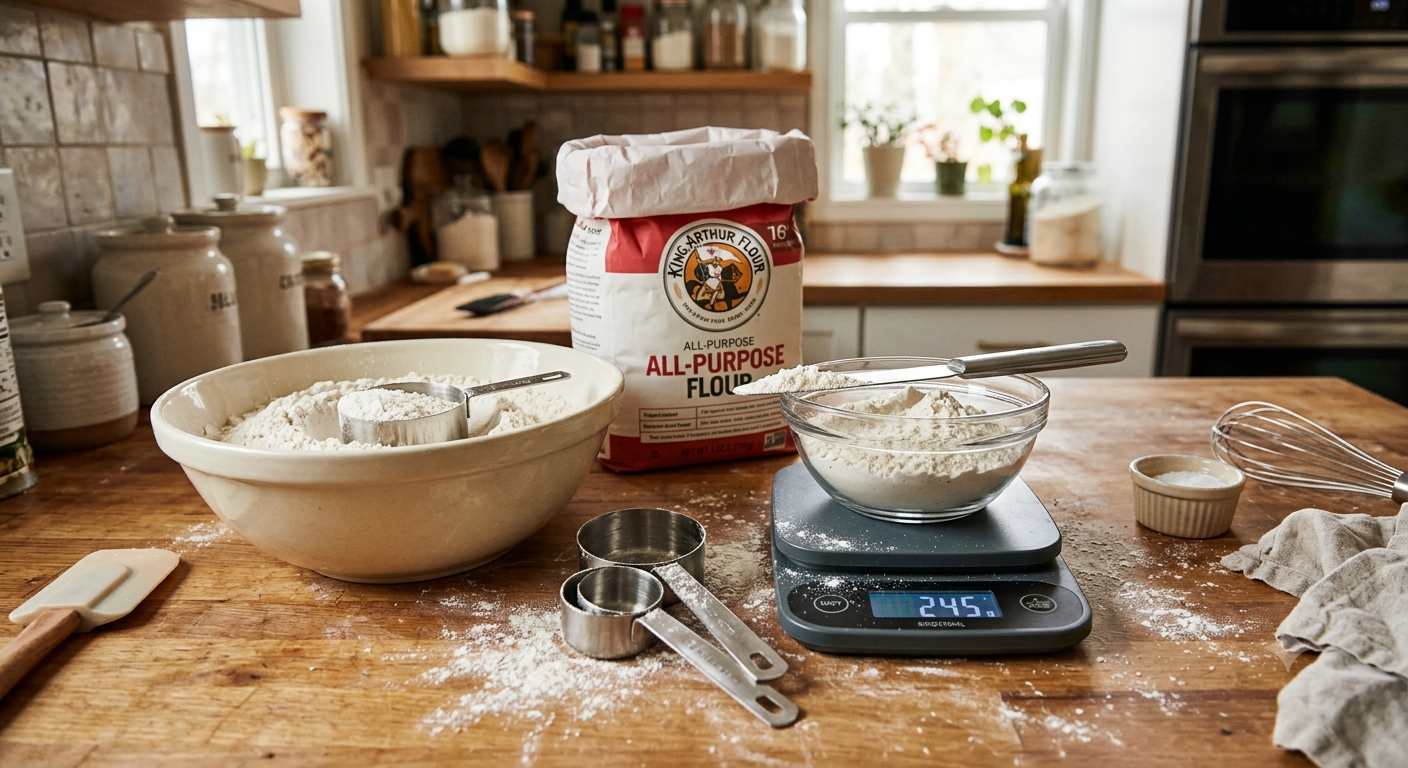
Method 1: Weigh It (Best)
This is how professional bakers measure flour. It’s also the easiest, fastest, and most accurate method — once you own a scale.
How to do it:
- Place your mixing bowl on the scale
- Press the tare button to zero it out
- Spoon, scoop, or pour flour into the bowl until the display reads the correct gram amount
- Done
It doesn’t matter how you get the flour into the bowl. You can scoop it, dump it, shake it — the scale doesn’t care about technique. 130 grams is 130 grams regardless of how it got there. That’s the whole point.
Standard flour weights per cup:
| Flour Type | Grams Per Cup |
|---|---|
| All-purpose flour | 120–130g |
| Bread flour | 130g |
| Cake flour | 115g |
| Whole wheat flour | 130g |
| Almond flour | 96g |
| Coconut flour | 128g |
| Powdered sugar | 120g |
| Granulated sugar | 200g |
| Brown sugar (packed) | 213g |
| Cocoa powder | 85g |
Bookmark this table or save it to your phone. Once you start converting your favorite recipes to grams, you’ll never go back.
What you need: Any digital kitchen scale accurate to 1 gram. The Etekcity scale does everything you need for about $13.
For a full comparison of budget to premium scales, read our kitchen scale vs measuring cups guide.
Method 2: Spoon and Level (Good)
If you don’t have a scale, this is the next best option. It’s what cooking shows and recipe developers mean when they say “1 cup of flour” — even though they rarely explain the technique.
How to do it:
- Fluff the flour in the bag or canister with a spoon first — flour compacts during storage
- Use a separate spoon to scoop flour out of the bag and drop it gently into your measuring cup
- Keep spooning until the flour mounds slightly above the rim
- Take a straight edge — the back of a knife, a chopstick, or a bench scraper — and sweep it across the top of the cup in one smooth motion, pushing the excess back into the bag
- Don’t tap the cup. Don’t shake it. Don’t press the flour down.
This method typically gives you around 125 to 135 grams per cup — close to what most recipes intend. It’s not as precise as a scale, but it’s dramatically better than scooping.
What you need: A good set of stainless steel measuring cups with flat rims (not plastic — plastic cups warp and the rims aren’t always flat enough to level against).
👉 Check current price: TILUCK Stainless Steel Measuring Set on Amazon →
Method 3: Scoop and Pack (Worst — Don’t Do This)
This is what most beginners do by default, and it’s the method that causes the most failures.
What it looks like: You dip the measuring cup directly into the bag of flour, push it down, scoop it out, and maybe tap it on the counter to settle it.
Why it’s a problem: Scooping compacts the flour into the cup. Tapping it settles it further. Packing it down makes it even worse. A cup of flour measured this way can weigh 170 to 180 grams — 40 to 50% more than the recipe intended.
That extra flour makes cakes dense, cookies dry, bread heavy, and muffins tough. And because the error happens before you even start mixing, no amount of technique can fix it.
The fix: Stop scooping. Use the spoon-and-level method above, or better yet, buy a scale.
What Happens When You Use Too Much Flour
Understanding the consequences helps you spot the problem in your own baking:
Cookies: Too much flour absorbs the moisture that should be creating a chewy texture. Cookies come out dry, crumbly, and cakey instead of soft and chewy. They also spread less, resulting in thick pucks instead of the flat, golden cookies you wanted.
Cakes: Extra flour creates extra structure — too much structure. The cake becomes dense, heavy, and dry instead of light and tender. It may also dome excessively because the rigid edges set before the center has finished rising. We covered this in detail in our post on why cakes are dense and flat.
Bread: Too much flour makes bread dough stiff and hard to knead. The finished loaf will be dense, dry, and won’t rise as much as it should. The crumb will be tight instead of open and airy.
Muffins and quick breads: Tough, dense texture with tunneling (large holes running through the crumb). Dry mouthfeel that makes you reach for a glass of milk.
What Happens When You Use Too Little Flour
The opposite problem is less common but equally frustrating:
Cookies: Not enough flour means not enough structure. Cookies spread into flat, greasy puddles that crisp on the edges and stay gooey in the center. They may also break apart when you try to move them.
Cakes: The batter is too thin. The cake may collapse in the center, have a gummy texture, or not set properly. It might look jiggly when you pull it from the oven even after the full bake time.
Bread: The dough is too wet and sticky to shape. It won’t hold its form during rising and may flatten in the oven instead of rising upward.
Common Flour Measuring Mistakes
Beyond the scoop-and-pack problem, here are other mistakes that throw off your measurements:
Using the wrong cup. Liquid measuring cups (the glass ones with a spout) and dry measuring cups are not interchangeable. A “cup” in a liquid measure accounts for the meniscus at the top. A dry cup is designed to be filled and leveled. Using a liquid cup for flour or a dry cup for milk gives you a slightly different amount.
Not fluffing first. Flour compacts during storage — especially if the bag has been sitting in your pantry for weeks. The flour at the bottom of the bag is denser than the flour at the top. Stirring or fluffing it with a spoon before measuring loosens it back up and gives you a more consistent scoop.
Measuring over the bowl. If you level your measuring cup over your mixing bowl, the excess flour falls into the bowl and you end up with more than intended. Always level over the flour bag or over the counter.
Using a rounded cup. If your measuring cup has a rounded rim instead of a flat one, you can’t level accurately. This is another reason stainless steel cups with flat, sharp rims are better than cheap plastic ones.
The Case for Buying a Scale
If you’ve read this far, you might be thinking “the spoon-and-level method seems fine.” It is fine. But a scale is better — and here’s why it’s worth the $13:
Speed. Weighing flour is actually faster than spooning and leveling. You dump flour into a bowl until the number is right. No spooning, no leveling, no cleanup of the excess.
One-bowl method. With a scale, you can add all your dry ingredients to one bowl — flour, sugar, cocoa, baking powder — pressing tare between each one. No separate measuring cups to wash.
Works with any recipe. More and more recipes include gram measurements alongside cups. European and professional recipes use only grams. A scale lets you follow any recipe from anywhere in the world.
Eliminates variables. Humidity, how long the bag has been open, which flour brand you use, how you scoop — none of these matter when you weigh.
We compared scales at every price point in our Essential Baking Tools for Beginners guide. The Etekcity scale at ~$13 is all most bakers will ever need. The Escali Primo at ~$25–30 is the upgrade for daily bakers.
Quick Reference: Flour Measuring Cheat Sheet
| Method | Accuracy | Typical Weight Per Cup | Best For |
|---|---|---|---|
| Scale (weighing) | Excellent | Exact — you set the number | Every baker, every recipe |
| Spoon and level | Good | ~125–135g | When you don’t have a scale |
| Scoop from bag | Poor | ~160–180g | Never — this causes failures |
| Scoop and tap | Worst | ~170–190g | Never — this is even worse |
The Bottom Line
Knowing how to measure flour correctly is the difference between recipes that work every time and recipes that fail for no obvious reason. The flour is almost always the reason when someone says “I did everything right and it still didn’t turn out.”
If you take one thing from this post: stop scooping flour directly from the bag. Either weigh it on a scale (the best option) or use the spoon-and-level method (a solid backup). That single change will improve every cookie, cake, muffin, and loaf you bake from this day forward.
For more tools and techniques that fix common baking problems, check out our beginner baking kit under $50 or our complete Essential Baking Tools for Beginners guide.
Happy baking, Clara Belle
Last updated: [DATE]. Prices fluctuate — always check current Amazon pricing before buying.